
Tried and failed, and then prevailed
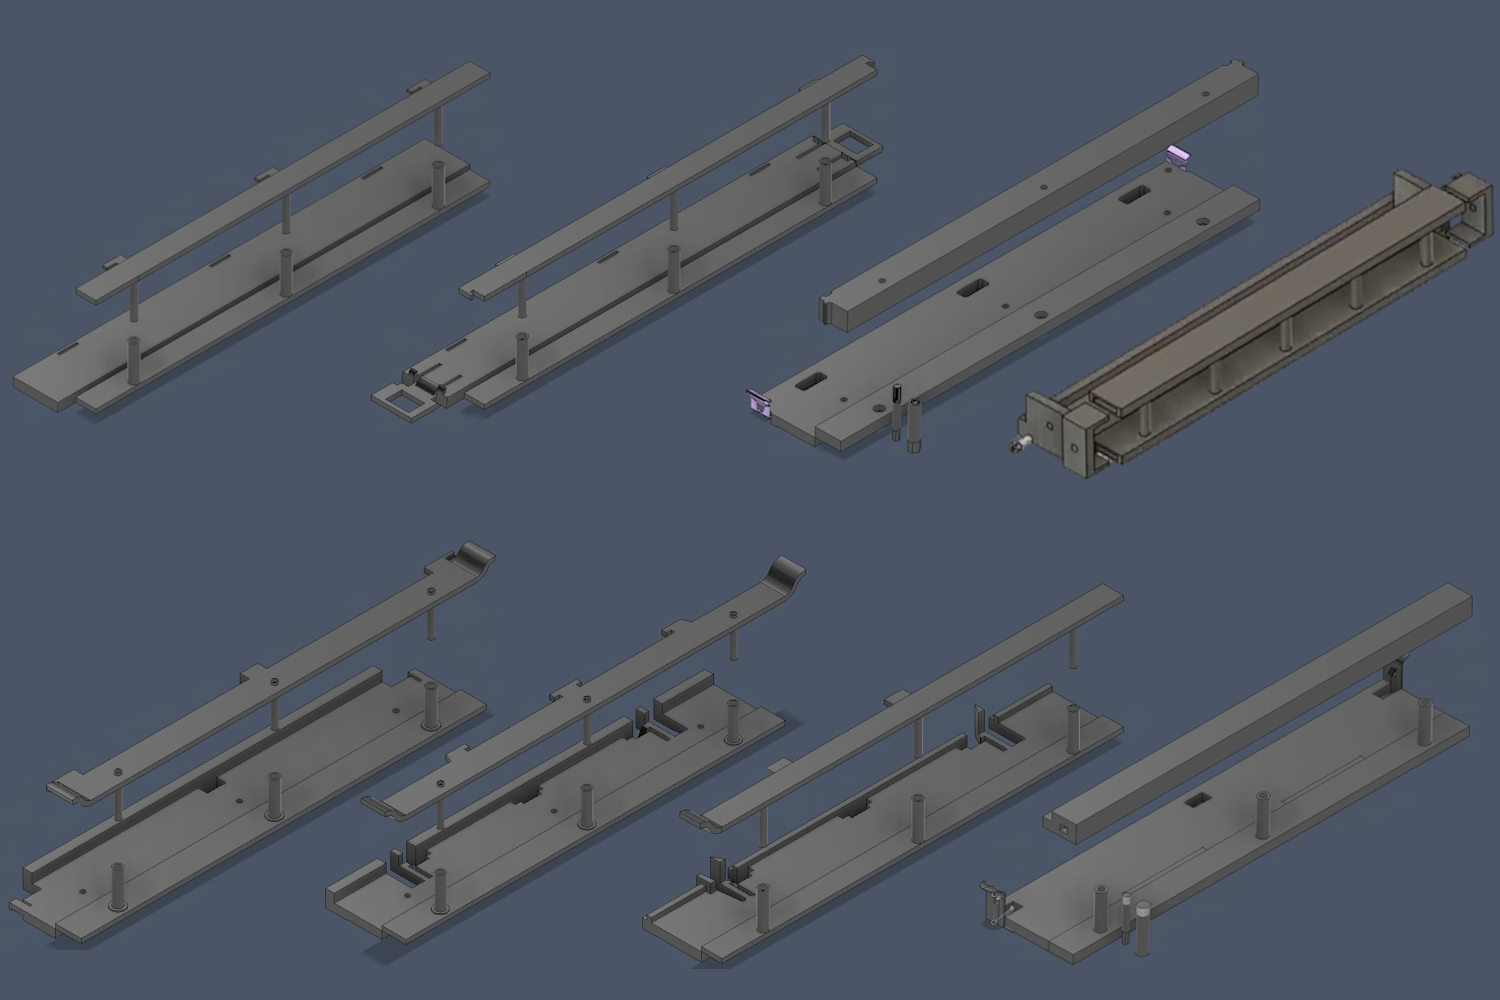
Eight of the many early versions of the binding device
If you haven’t yet, check out the article on the MOTIVATION behind Volio.
Starting small
When I started brainstorming a ring-free loose-leaf binder, I only intended to make something for my personal collection. I started with the simplest solutions.
My first idea was using post screws (aka Chicago screws, barrel nuts). I built a janky prototype by cutting the rings off a spare D-ring binder, slicing the spine down the middle, and punching holes for the posts. As soon as I put the pages in, I knew it wouldn’t work.
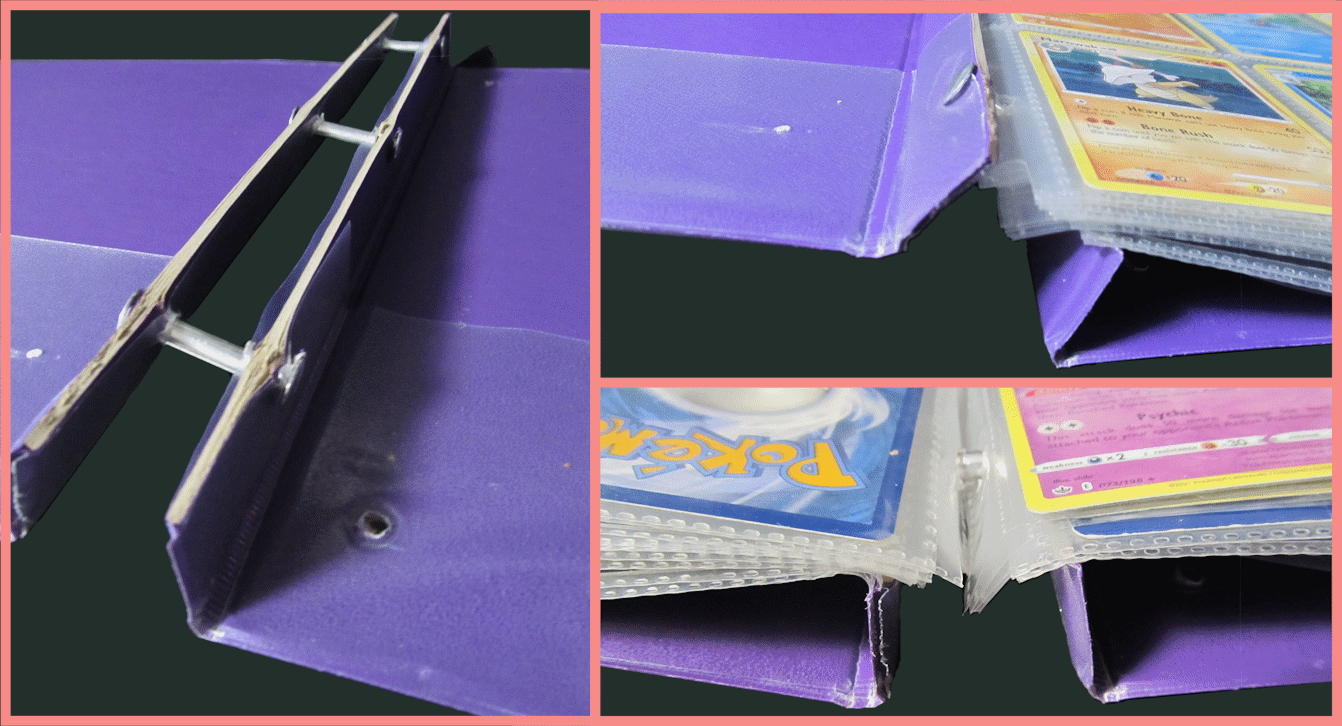
Post screws don’t work with existing pages
The card pockets were too close to the binding holes. There wasn't enough margin between the side plates and the cards, so the cards bunched up, laid against the sides the spine, and bent against each other when the pages were turned or laid flat.
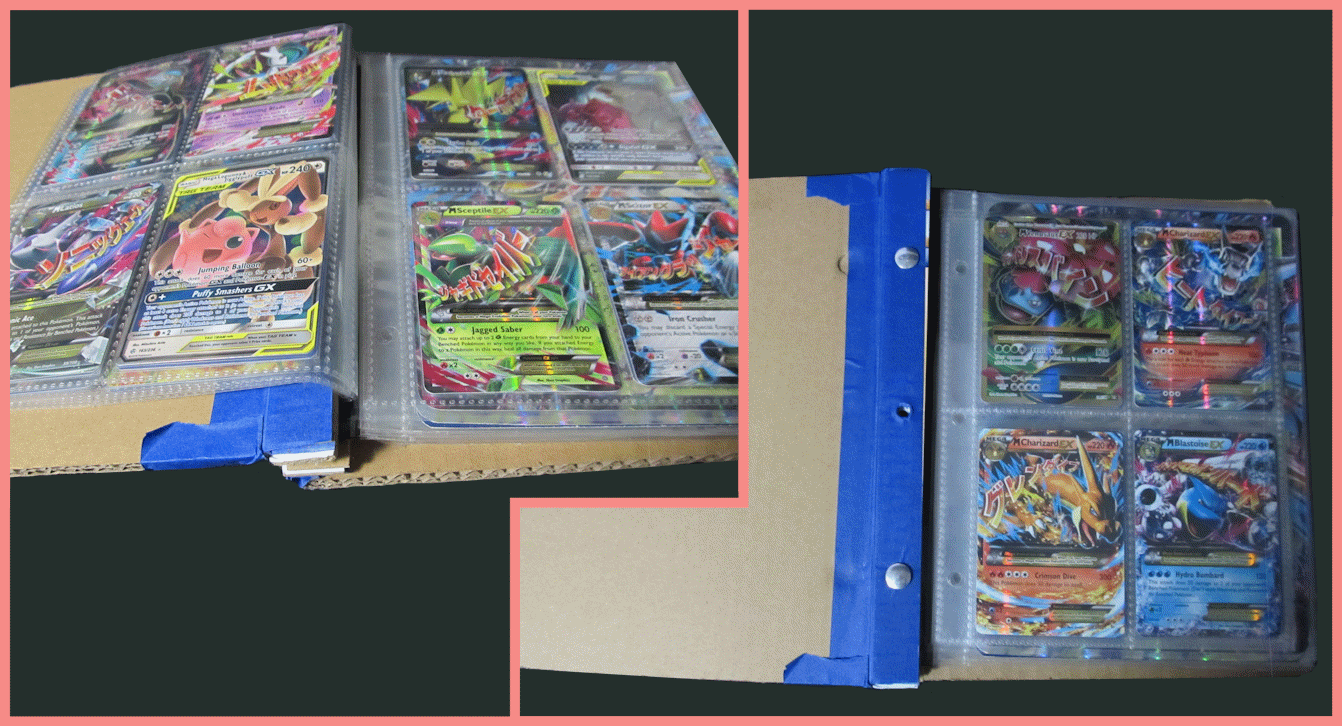
Pages need extra space between the cards and the post binding
The solution was simple: I needed pages with extra margin between the holes and the pockets, but those didn’t exist. I contacted a few manufacturers, including BCW, to get a quote for custom pages, but they all required a minimum order of tens of thousands of dollars. I didn’t need hundreds of thousands of pages, and I didn’t have that kind of money to drop on a small upgrade.
Thinking bigger
HOWEVER! This was when my entrepreneurial gears started squeaking into action. Was I the only person who wanted this? Could I get other people interested so we could share the cost?
While considering this, I realized a few other things I hated about post screws. The posts never aligned perfectly with the page holes; I had to individually adjust them for each page. If I needed to add a page in the middle, I had to remove the upper pages, add the new page, and the re-align all of the pages I had previously removed. Plus, the screws were tiny, easy to lose, and required keeping a screwdriver and/or Allen key handy.
I decided I wanted to make something that acted like a three-ring binder mechanism, but with posts instead of rings. It needed to be easy to open intentionally, nearly-impossible to open accidentally, and as minimal and low-profile as possible.
I tried a number of different implementations, a few of which are shown in the main image of this article. Finally, I landed on a version that felt simple and intuitive.
The Final Form
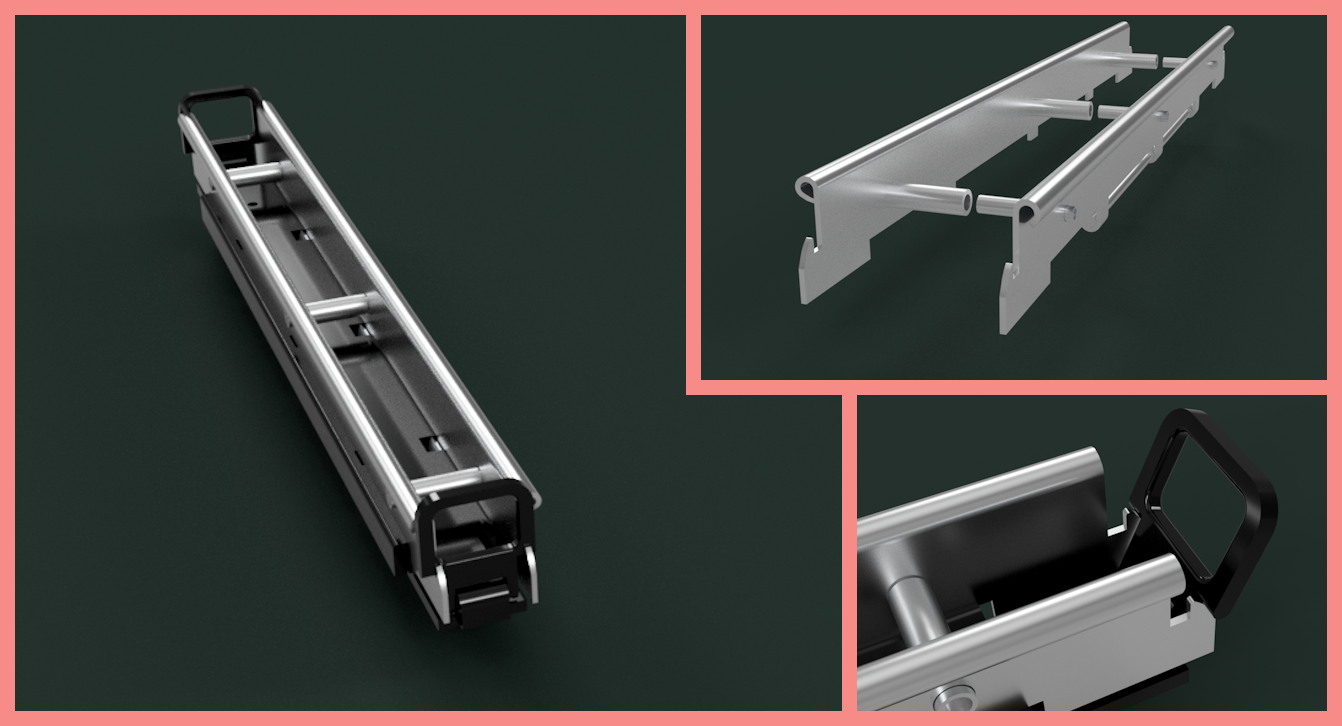
Digital renders of the final design
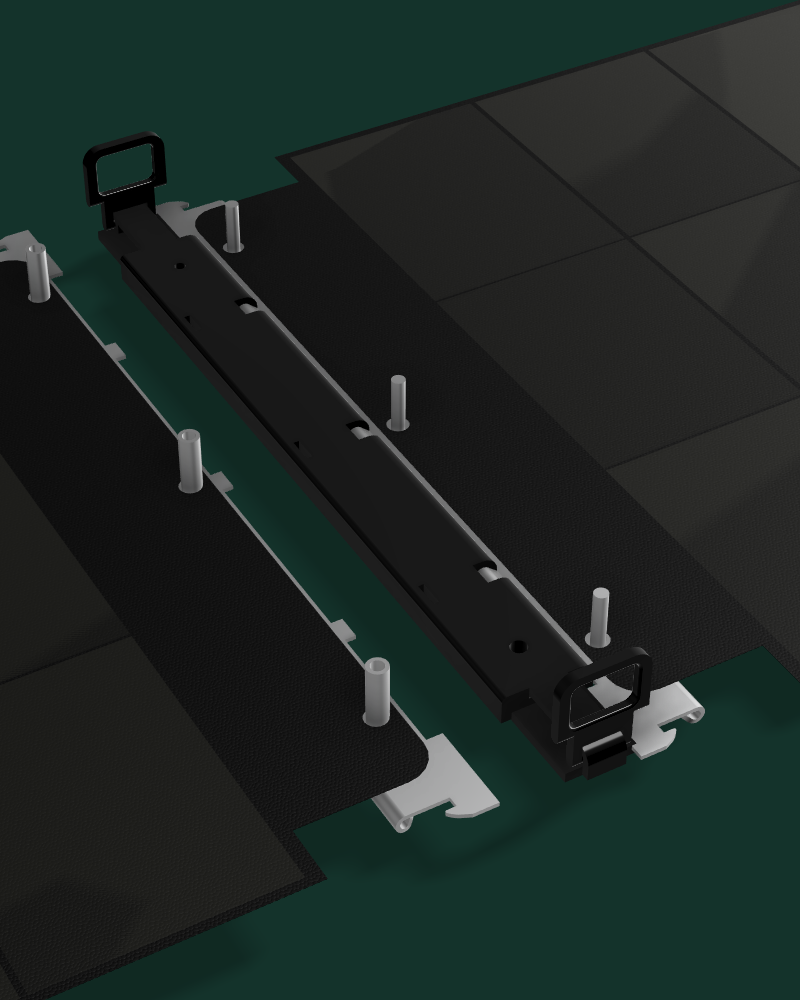
Digital rendering of the binding device open to add and remove pages. Pages have added margin to separate the cards from the binding.
I guided my final design choices with a specific set of requirements:
The cards must never contact the binding device under normal use
I stuck with the idea of using posts, but instead of individual screws, I fastened them to a rigid metal plate to keep everything perfectly aligned. This keeps the binding mechanism extremely low-profile. I also designed custom polypropylene pages (above) with extra margin between the pockets and the binding holes.
Adding and removing pages from anywhere in the stack must be quick and easy
The binding plates use complementary, interlocking post pairs—the posts on one plate slide directly into the posts on the other. This keeps the page holes aligned no matter where you split the stack to add or remove pages.
To make handling pages even easier, I created a feature called the “lift-off sheet,” which lets you cleanly lift away and replace entire sections at once. (You can see how this works in this prototype video.)
The mechanism must be easy to latch and unlatch, but nearly impossible to open by accident
I wanted the opening action to feel familiar—like a traditional 3-ring binder—without the risk of the binder accidentally popping open. I designed a latch that secures easily by rotating up, but requires a deliberate lift-and-turn motion to release.
I also ensured each latch can be operated with one hand, making the design far more accessible for users with limited mobility.
Note: I’m planning a full weight test to see how much stress the latch can take before failure once my near-final prototype arrives.
The materials must be safe for sensitive printed materials and photographs
I prioritized materials that are proven "archival safe" and standard across high-end preservation gear:
Pages: acid-free polypropylene—the gold standard for protecting cards and photos from yellowing or degradation over time.
Binding Plates & Posts: anodized aluminum. The anodizing process seals the metal with a hard aluminum oxide crystalline shell, protecting it against corrosion in humid conditions while boosting overall durability.
Base Plastic: acid-free polypropylene, chosen for its extreme fatigue resistance and zero off-gassing. When used in cantilever latches, it can withstand hundreds of thousands of open/close cycles without wearing out.
Latch Handles: high-density polyethylene (HDPE)—another archival-safe plastic. HDPE glides effortlessly against both anodized aluminum and polypropylene, giving the latch a slick, smooth feel.
Be part of the solution!
This binder started as a personal project, but bring it to life, I need to hit factory minimums. That’s where you come in.
I’m launching a Kickstarter campaign soon to make this binder a reality for collectors everywhere.
